Replacement of a single tooth

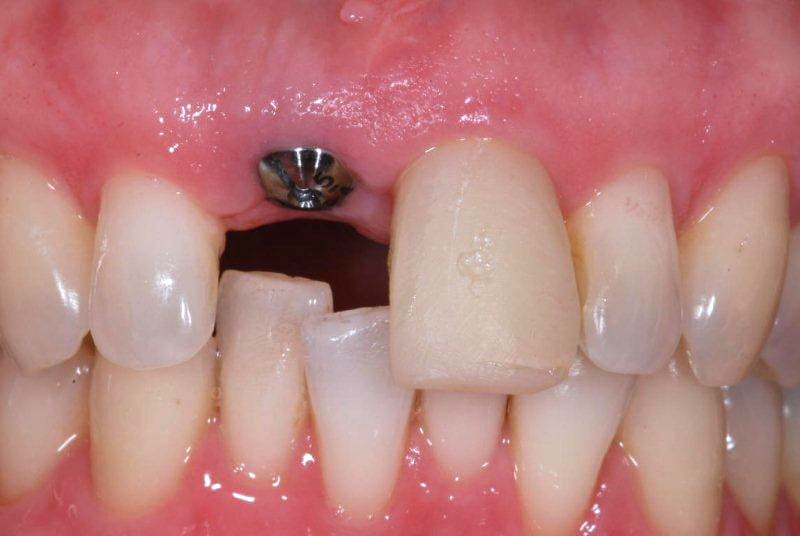
1. PRE-TREATMENT

2. PRE-TREATMENT
3. THE HEALING COLLAR IN PLACE

4. THE HEALING COLLAR IN PLACE
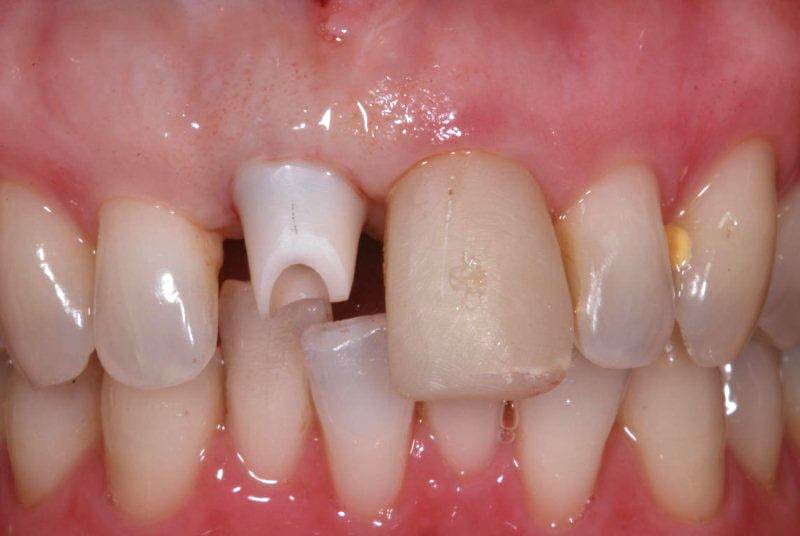
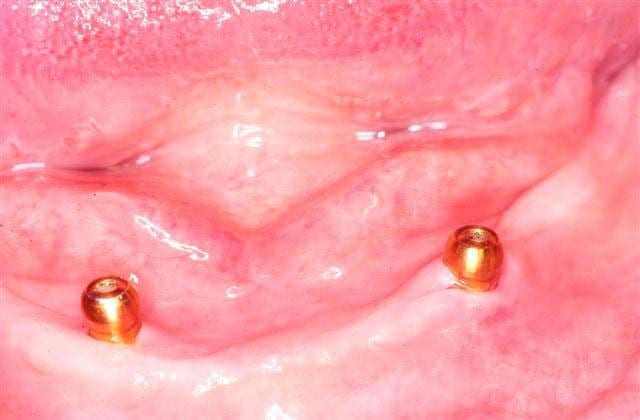
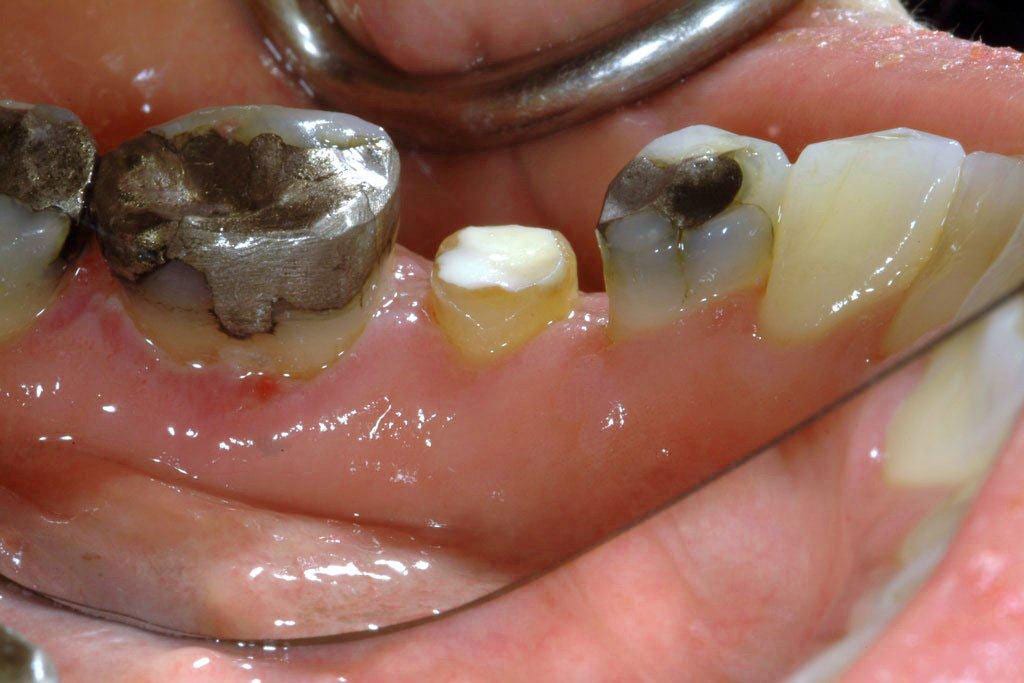
5. RESTORATIVE ABUTMENT
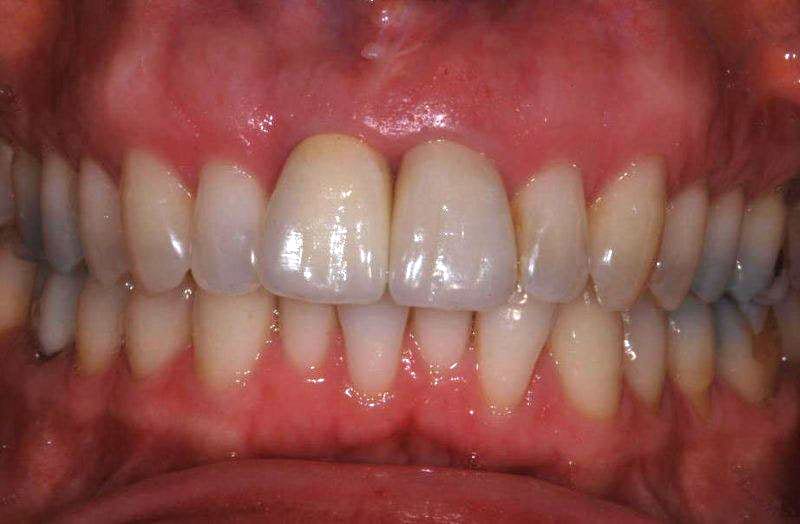
6. THE FINISHED RESULT
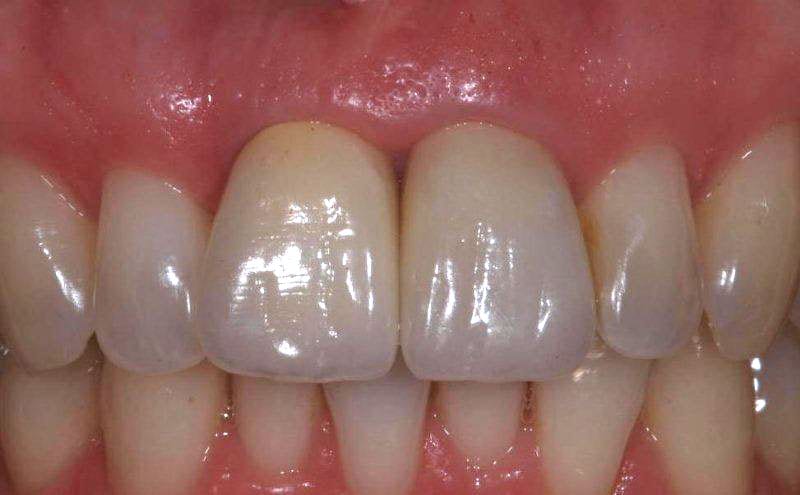
7. THE FINISHED RESULT
A number of people have missing front teeth either because the teeth themselves did not develop, or were lost due to infection or trauma.
Where a front tooth fails or is lost, the condition of the adjacent front teeth will in part dictate what solution is most appropriate to replace it. Where one of both of the adjacent teeth are either un-restored or only have small fillings then providing a bridge as an alternative is inappropriate. The implant crown is then the treatment option of choice.
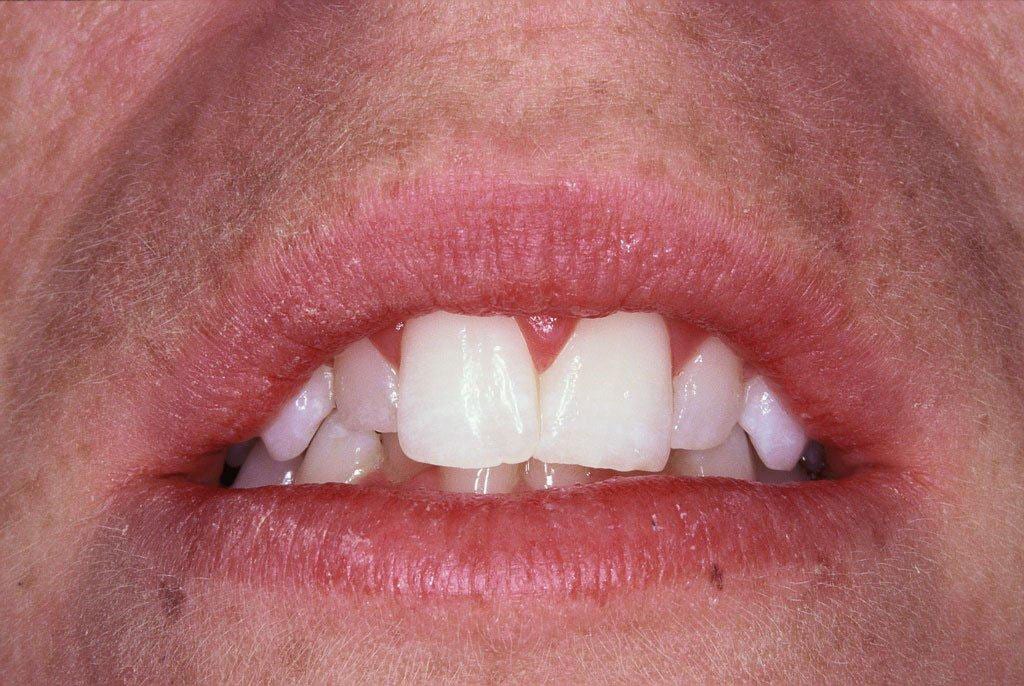
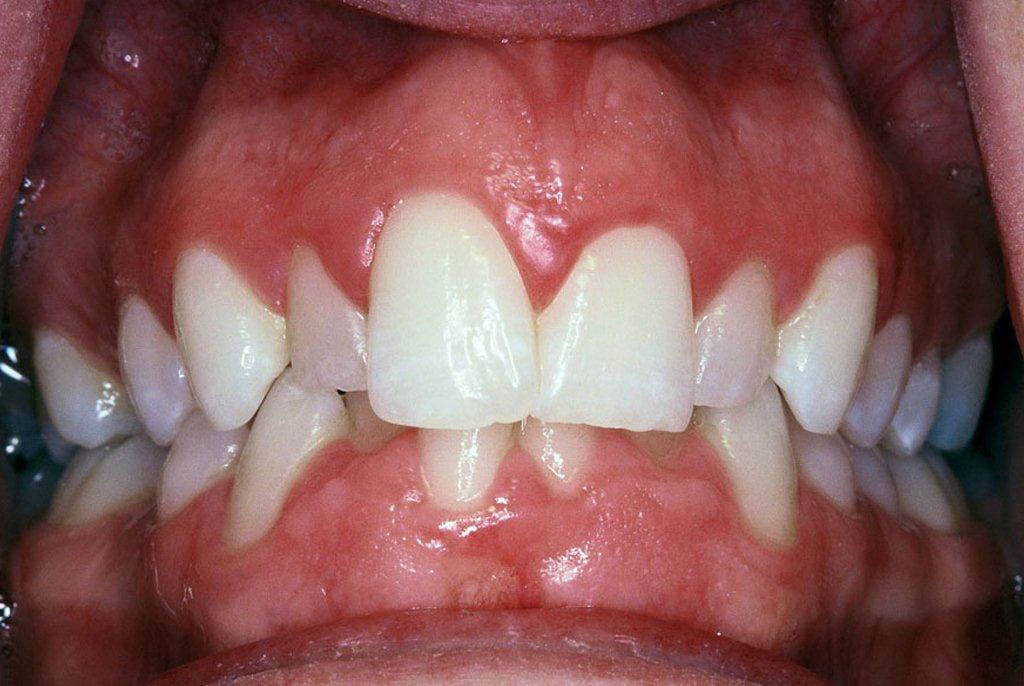
In this case the upper right central incisor was lost due to a failed root canal and root fracture. Of the two adjacent teeth one needed to be crowned (the left central incisor) whilst the other was un-restored. The patient chose the implant option – images 1 and 2.
The implant is placed and most of the time a healing collar is attached to the implant at the same time, which the gum heals around – images 3 and 4.
In this case the patient had a removable partial denture that she wore for appearance purposes during the treatment period.
At the end of the bone-healing period, an impression is taken that index where the implant is in relation to the teeth. This allows construction of a restorative abutment that the final crown is cemented to – image 5.
The restorative abutment provides the base or intermediate component that the crown is cemented on to.
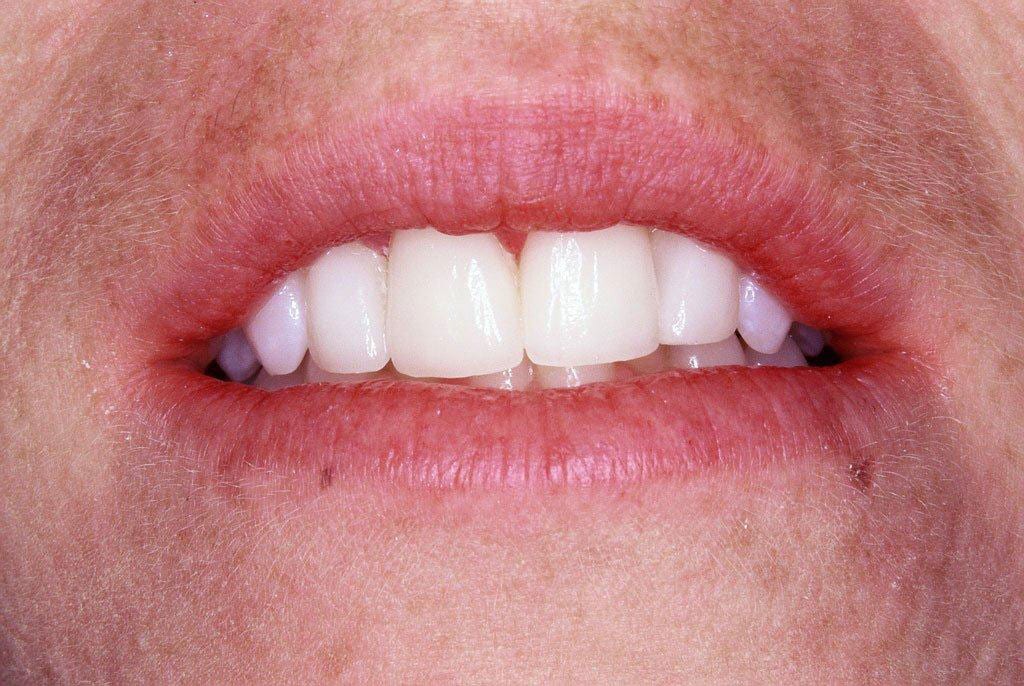
The finished result – two crowns, one on the implant and the other on the left central incisor – images 6 and 7.
Replacement of several teeth
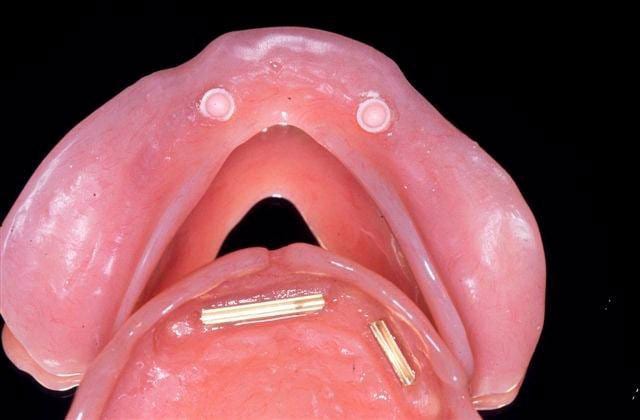
1. ATTACHMENTS

2. THE COMPLETED DENTURE
3. THE COMPLETED DENTURE
IMPLANTS TO SUPPORT YOUR LOWER DENTURE
Many denture wearers cope with their upper denture, however they find the lower denture difficult to wear and keep in place. There is a solution.
By having two implants placed in the lower jaw, roughly where the eye-teeth used to be, attachments can then be placed to secure the denture stopping it ‘jumping’ and moving around.
The attachments are either magnetic or mechanical (ball & socket), one part on top of each the implants and the other embedded in the base of the partial denture – image 1.
Generally in the lower jaw you need to wait between 6-12 weeks between placement of the implants and putting the attachments in your denture. This is the time it takes for the bone to heal against the implants – a process we refer to as osseointegration. During that time you can wear your existing denture over the implants – images 2 and 3.
You can have something similar done in the top jaw supporting your upper denture. You need more implants however, generally 4, as the bone ‘quality’ is not as good in the top jaw as in the bottom jaw.
Functional crown lengthening
1. PRE-TREATMENT: TONGUE SIDE
2. PRE-TREATMENT: CHEEK SIDE
3. POST-TREATMENT: TONGUE SIDE

4. POST-TREATMENT: CHEEK SIDE
Periodontal procedures such as crown lengthening are available to lay the groundwork for restorative and cosmetic dentistry, to improve function and the appearance of your smile.
This is done for functional reasons where:
- Teeth are excessively short
- The margins of existing fillings finish below gum-line, or
- Teeth break with the fracture line below gum-line
Any of these occurrences can mean:
- There is not enough tooth present to allow the tooth to be predictably restored with a crown.
- Your dentist can have trouble getting an accurate impression and therefore the new crown will not fit well. In this case it will almost certainly not last as long as it should.
- Large fillings or crowns on back teeth should finish at or just above the gum-line – this enables you to clean and maintain them limiting the risk of decay or gum disease.
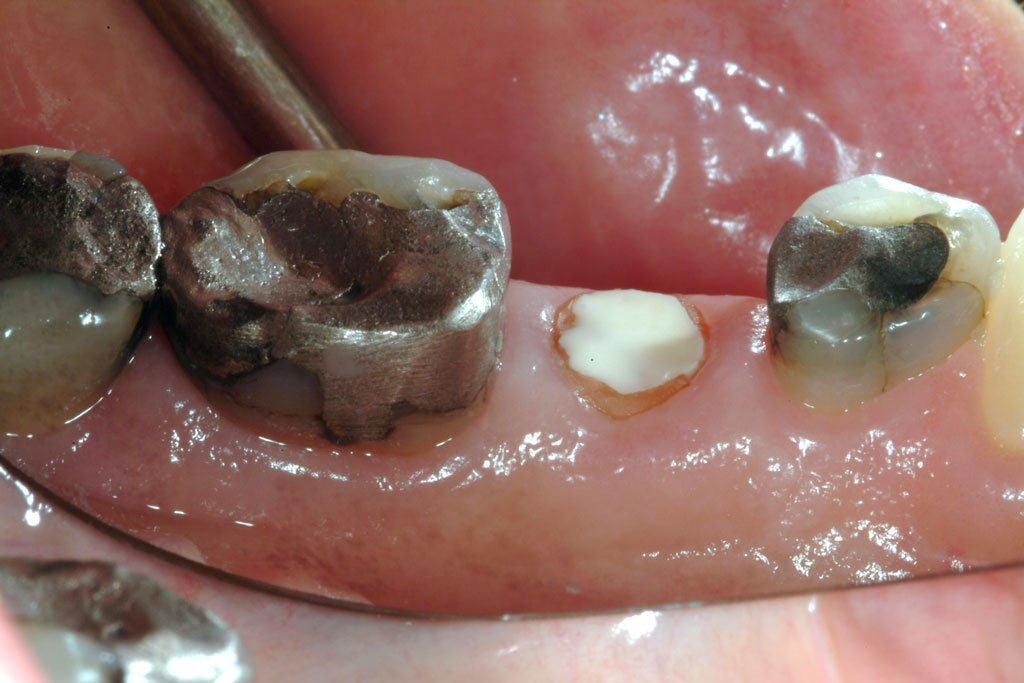
In this case the crown on the tooth just came off! Too little tooth & a very large filling – all of which came off in the crown leaving the tooth flush at gum-line – images 1 and 2.
What were the options?
A new crown, a bridge using the adjacent teeth or an implant. In this case a new crown was the easiest and judged to be the best option (the tooth had already been root-filled).
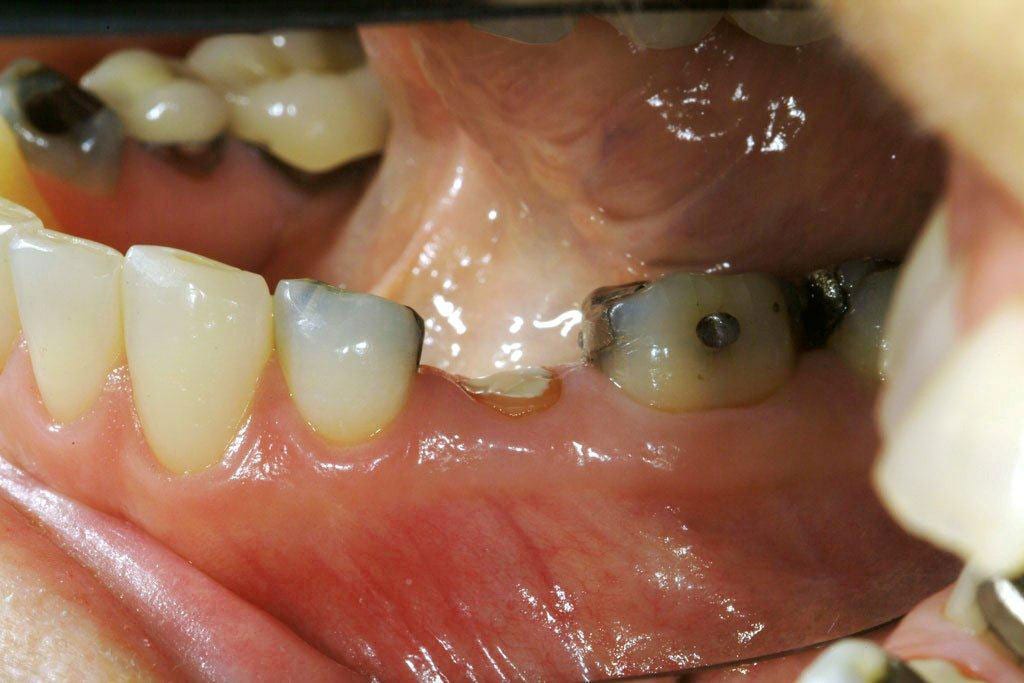
Crown lengthening the tooth exposing 2mm of tooth structure, allowed the tooth to be restored with a new crown 6 weeks later – images 3 and 4.
The tooth is now ready to have a crown made.
Aesthetic crown lengthening
1. PRE-TREATMENT
2. PRE-TREATMENT
3. POST-TREATMENT

4. POST-TREATMENT
Periodontal procedures such as crown lengthening are available to lay the groundwork for restorative and cosmetic dentistry, to improve function and the appearance of your smile.
As you can see from the pre-treatment photo (images 1 and 2), the patient was not worried about the crowding of the lower front teeth, these were not visible.
She was concerned however, about the gummy appearance and mismatched front teeth together with the small sized front teeth, one out from the mid-line on each side.
The case was treated by a combination of periodontal treatment – aesthetic crown lengthening and her dentist then went on to do four crowns for her – images 3 and 4.
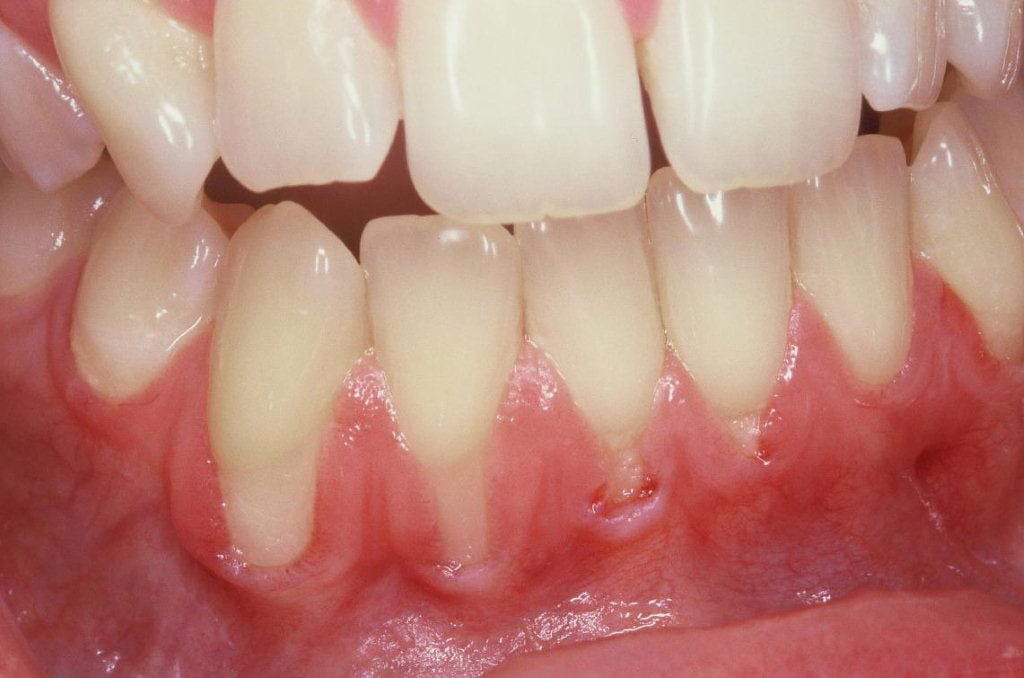
Gum graft
1. PRE-TREATMENT

1. RESULTS AFTER 4 YEARS
Soft tissue grafts are used to cover exposed root surfaces and replace gum tissue. Gum recession occurs for a variety of reasons including ageing, aggressive tooth brushing, periodontal disease or a combination of factors.
This patient was very aware of the appearance of the recession on her lower right eye tooth and lateral incisor. She also had difficulty cleaning it because the teeth were so long.
There are various methods of treating recession, in this case some gum tissue was borrowed from the palate to graft and cover the exposed root surface – images 1 and 2.
The results 4 years after treatment – image 2.